Let's see how to verify your Instagram account and get the blue check. And it is that instagram, the popular social network in which to share our photographs and stories, enabled in the summer of 2018 the possibility of request account verification to all users; Finally, any user can ask Instagram to verify their account, thus achieving the famous blue check which demonstrates it, both through Windows like smartphones iOS and Android. But, what steps should we follow and what requirements do we need to achieve the desired blue check? Follow our step-by-step guide to see if you meet the requirements and you can request account verification to those responsible for instagram.
Index of contents
How to verify your Instagram account step by step
In reality, the steps to follow to request verification of our account to instagram They are quite simple, although many users are unaware of this possibility. Of course, the requirements to achieve the blue check are quite numerous and, in many cases, difficult to fulfill, although we can always try our luck. Below we detail the main requirements to request verification of your Instagram account:
- The first thing is to comply with Instagram rules, such as the Terms of Service and Instagram Community Rules to qualify for verification.
- The account must be the only one the person or entity has, except for official accounts in different languages.
- It must be a genuine account managed by a real person or entity.
- The profile must be public (not private) and complete.
- The profile cannot invite the user's other social networks.
- You must not offer or share false information of any kind.
- And most importantly, an account that wants to be verified must be relevant, with many followers and that generates notable visitor traffic.
Once we are clear about the requirements to qualify for verification from our Instagram account, we must follow the following steps to confirm the request:
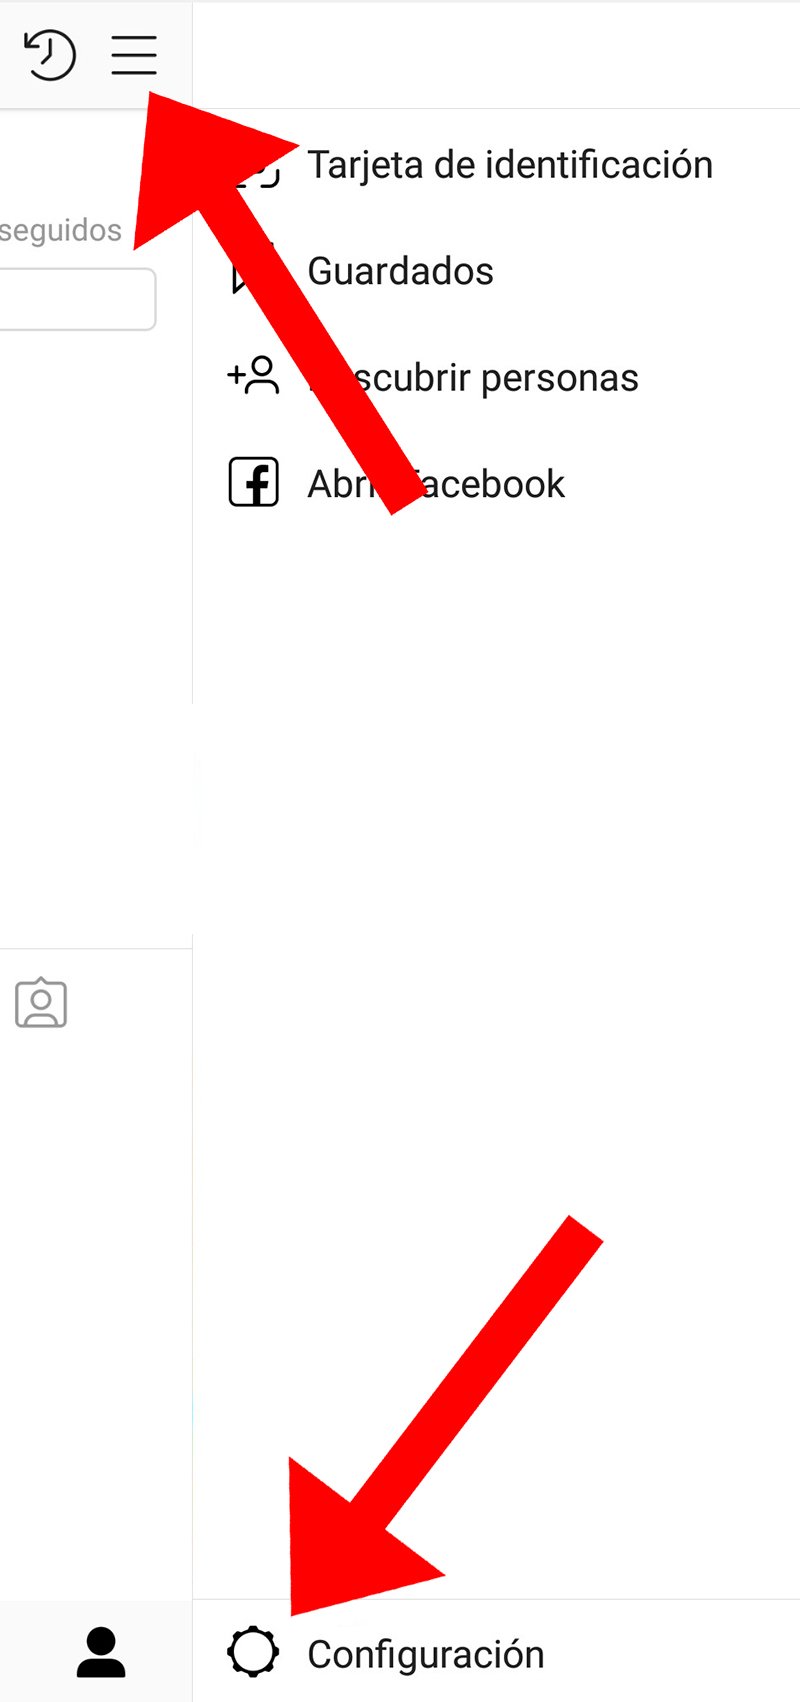
Access your account instagram and click on the icon Options from your Profile, located in the upper right part of the screen, in the form of three horizontal stripes.

In the menu that will be displayed on the right of the screen you must click on the icon Setting, represented by a gear wheel and located at the bottom of the screen.

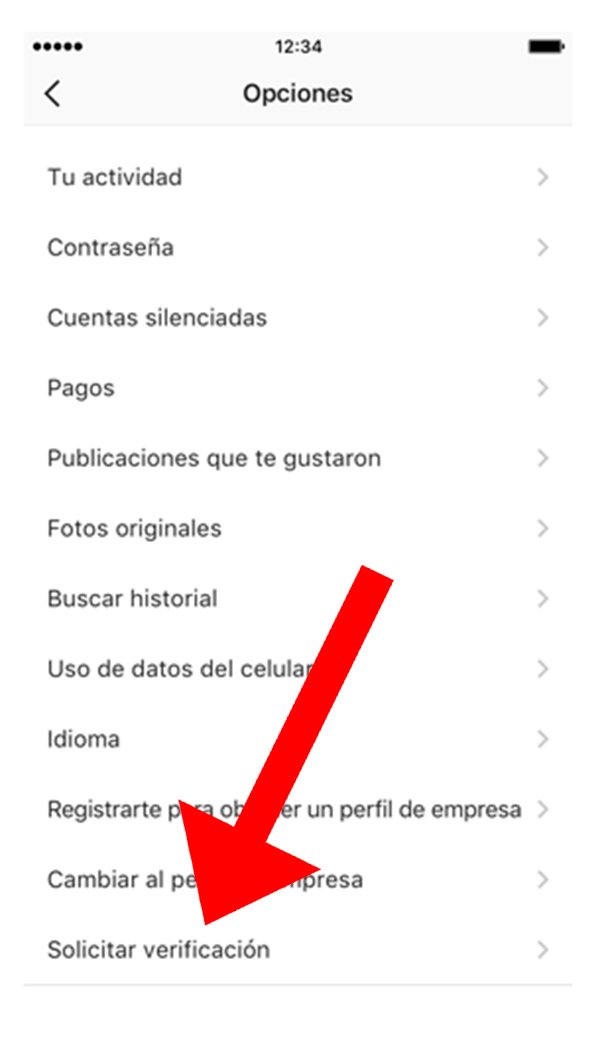
Already in the menu Setting, we must scroll to the end of it to find the option Request verification, among the options Private account and Switch to business account.

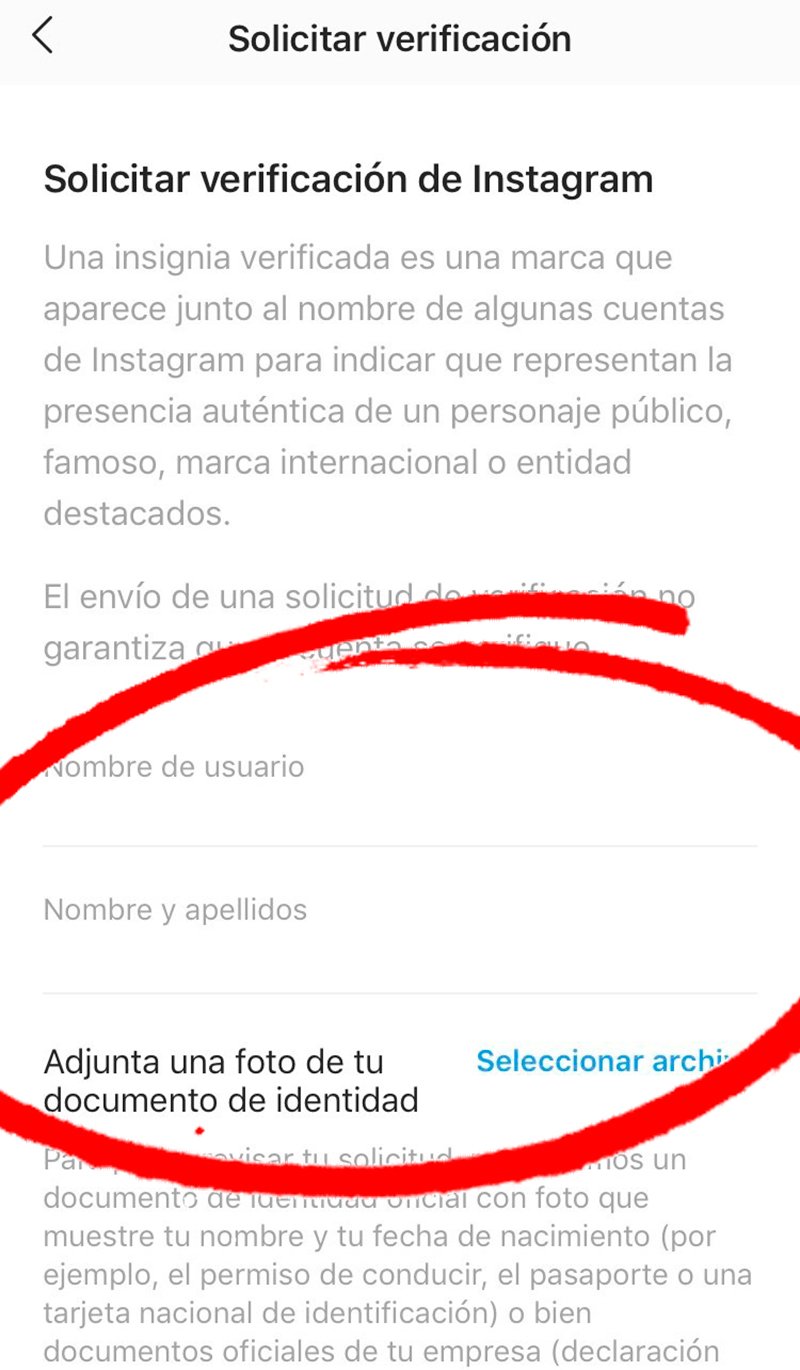
Once inside Request verification, a menu will appear with several fields personal information that we must fill out. They are the following:
- Username: Name of our account profile that will be filled in automatically.
- Name and surname: We must enter our real name and surname.
- You are known as: Here we must put our stage name or internet nickname by which we are known.
- Category: We must choose the category that best suits our account, such as News/Media, Sports, Music, Fashion, Blogger or Politics, among others.
- Attach a photo of your identification document: We must add an image of our real identity card.
When we have completed all the fields of the application, all we have to do is click on the icon Send and our request will be completed. Now it's Instagram's turn, where it will check all the data. If we are sufficiently relevant and we meet the requirements, we will be given the blue check; Otherwise, we will continue to have our account unverified.
Download the Instagram app for your PC and mobile
-
Windows/Microsoft Store (PC)
-
App Store (iOS)
-
Google Play (Android)

