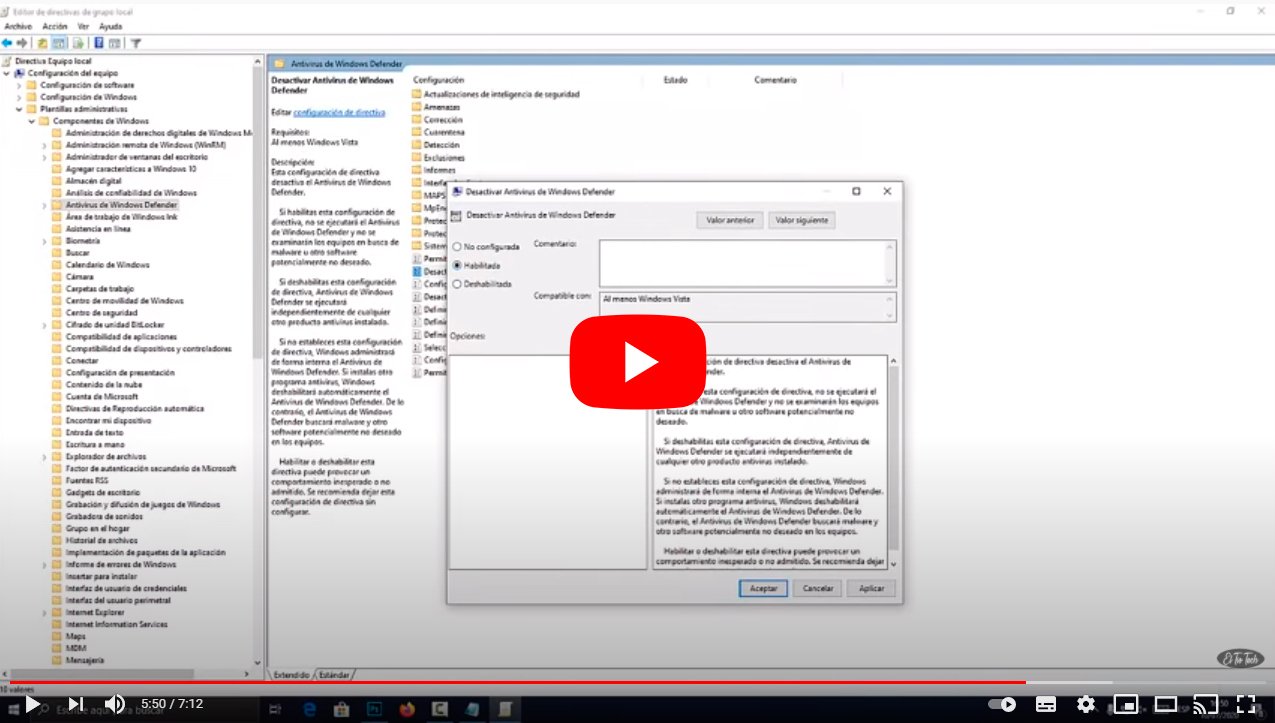
Next we will see how to disable Windows Defender, the antivirus integrated by default in Windows 10, through all possible methods. Windows Defender It is the default antivirus Windows 10, a very useful protection software that we recommend having always on for greater safety of our team, especially during Web browsing. And Windows Defender does not prevent us from having other antivirus or third-party security tools running at the same time. But sometimes it can be useful or advisable temporarily disable it. Therefore, below we offer you a complete tutorial on how disable Windows Defender Windows 10.
How to disable Windows Defender
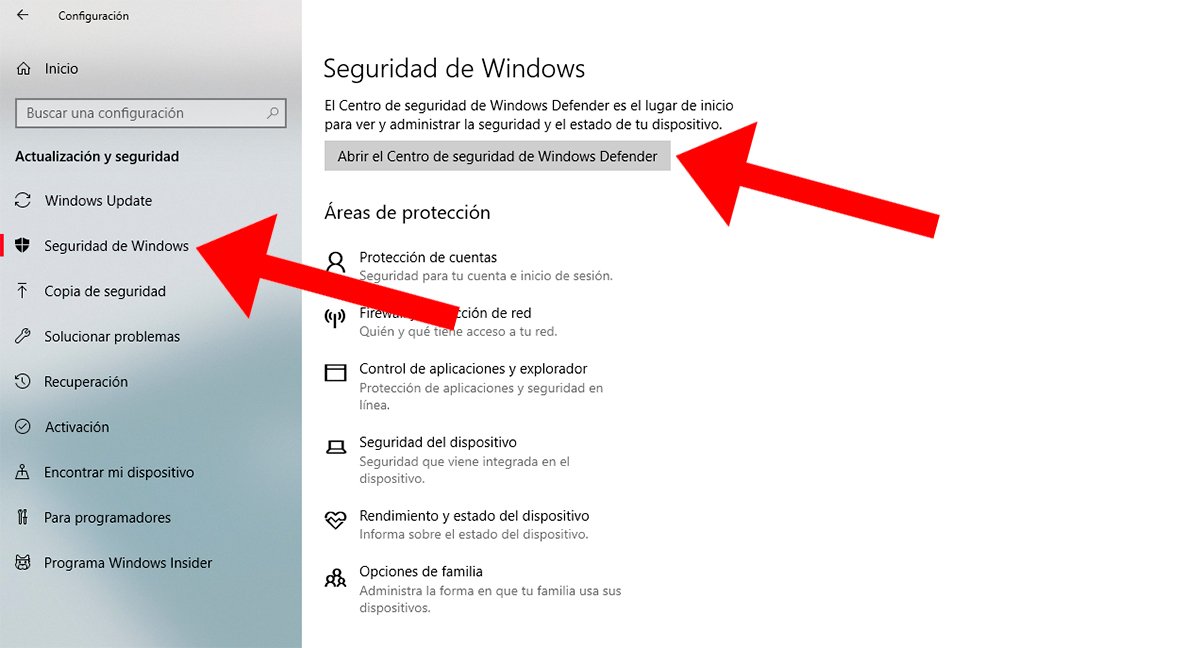
Windows Defender is the windows 10 antivirus, so to access its configuration and options you only need to write Windows Security in the search box on the Windows 10 taskbar and click on the search result. Although it is also possible to open Windows Defender through the path Update and security – Windows Security – Open Windows Security.
Sometimes it is necessary to disable Windows Defender if we have problems in some kind of installation software, in case it interferes with the correct installation of any program. So much so, that Windows will only allow us disable Windows Defender for a certain time; once said time has elapsed it will activate itself again.
Index of contents
- How to disable Windows Defender in Windows 10
- How to disable Windows Defender in Windows 10 completely
- How to disable Windows Defender in Windows 10 Pro
- Consequences of disabling Windows Defender in Windows 10
How to disable Windows Defender in Windows 10
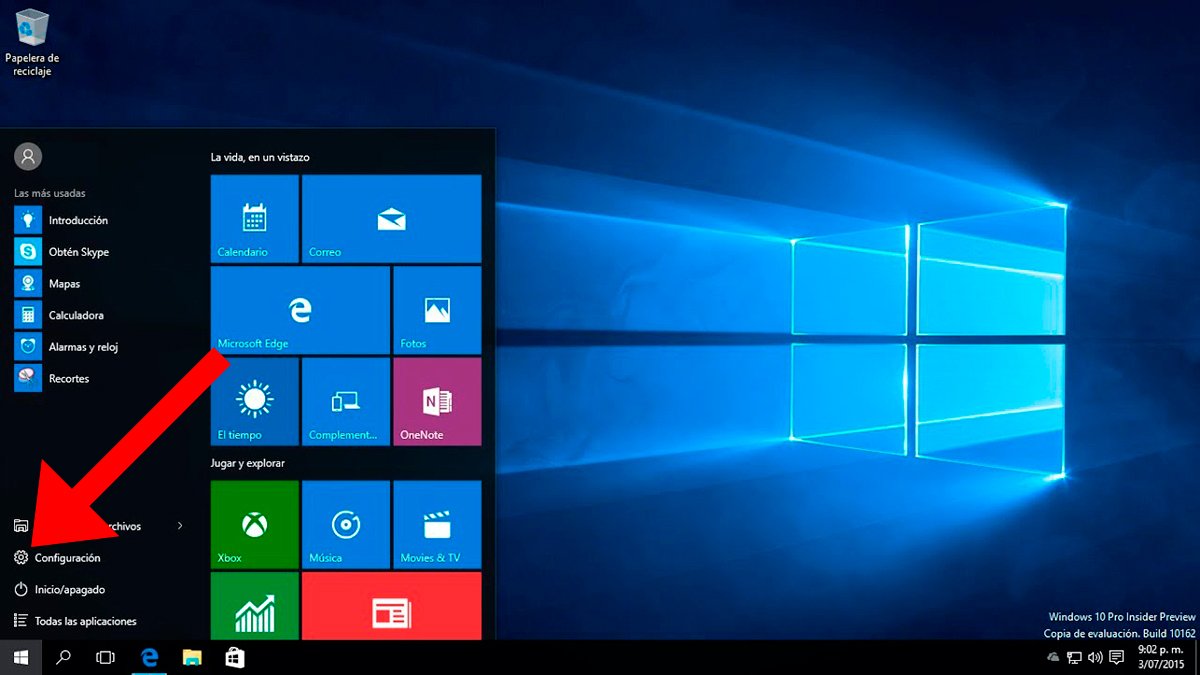
The first thing we must do to deactivate Windows Defender is to go to Windows Settings; To do this, open the menu Start of Windows 10 and click on it gear wheel icon. You can also write directly Windows Defender in the Windows search bar or press the key combination Windows + I to open the window Windows Settings.
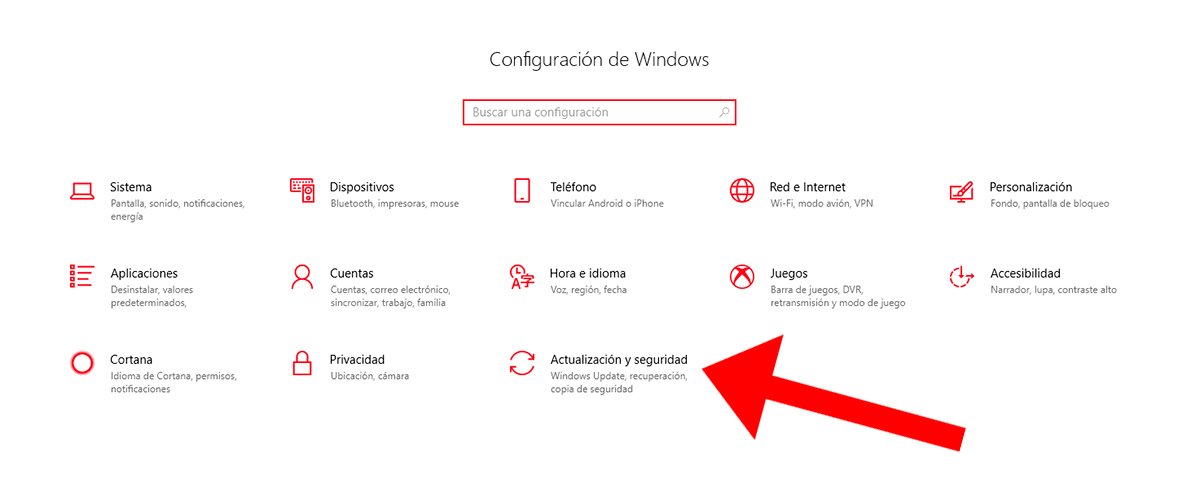
Now in the Windows Configuration window, click on the option Update and security; once inside the menu access the option Windows Security and then press the button Open Windows Defender Security Center, located in the upper right.
If you have not disabled any default security system in Windows 10, all icons will appear with a check green; Otherwise, they will appear with a check red. Now access the first option called Antivirus and threat protection.
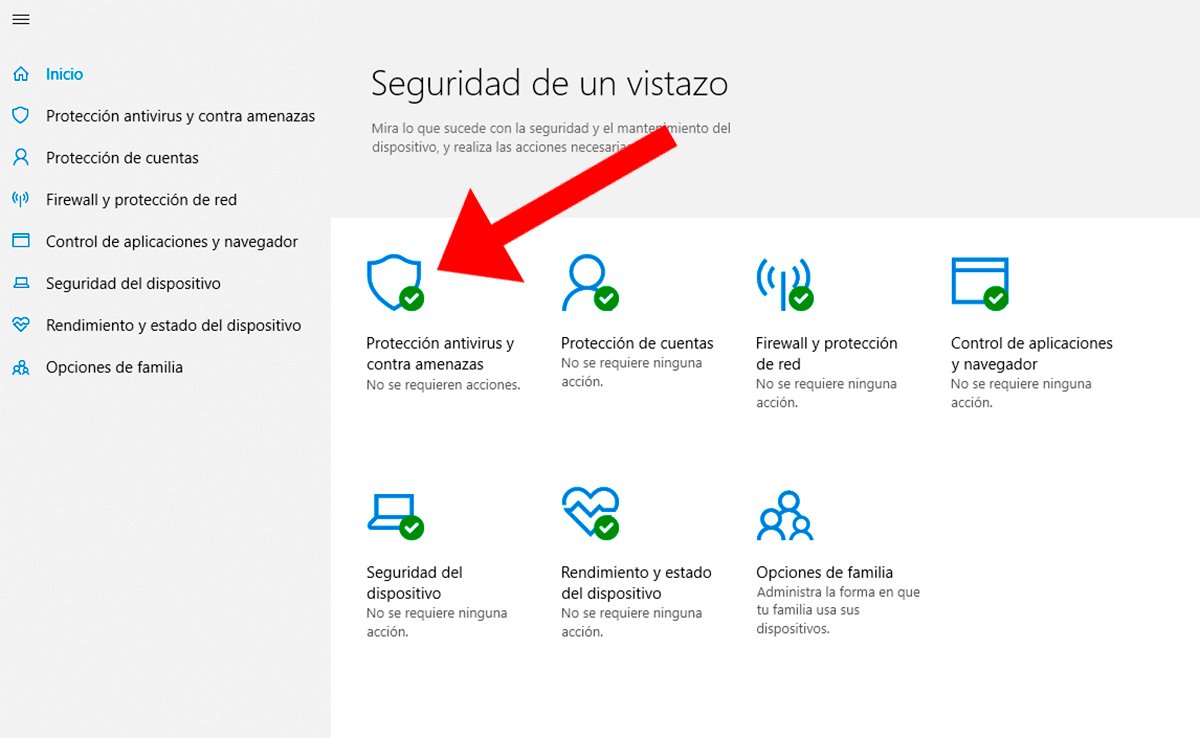
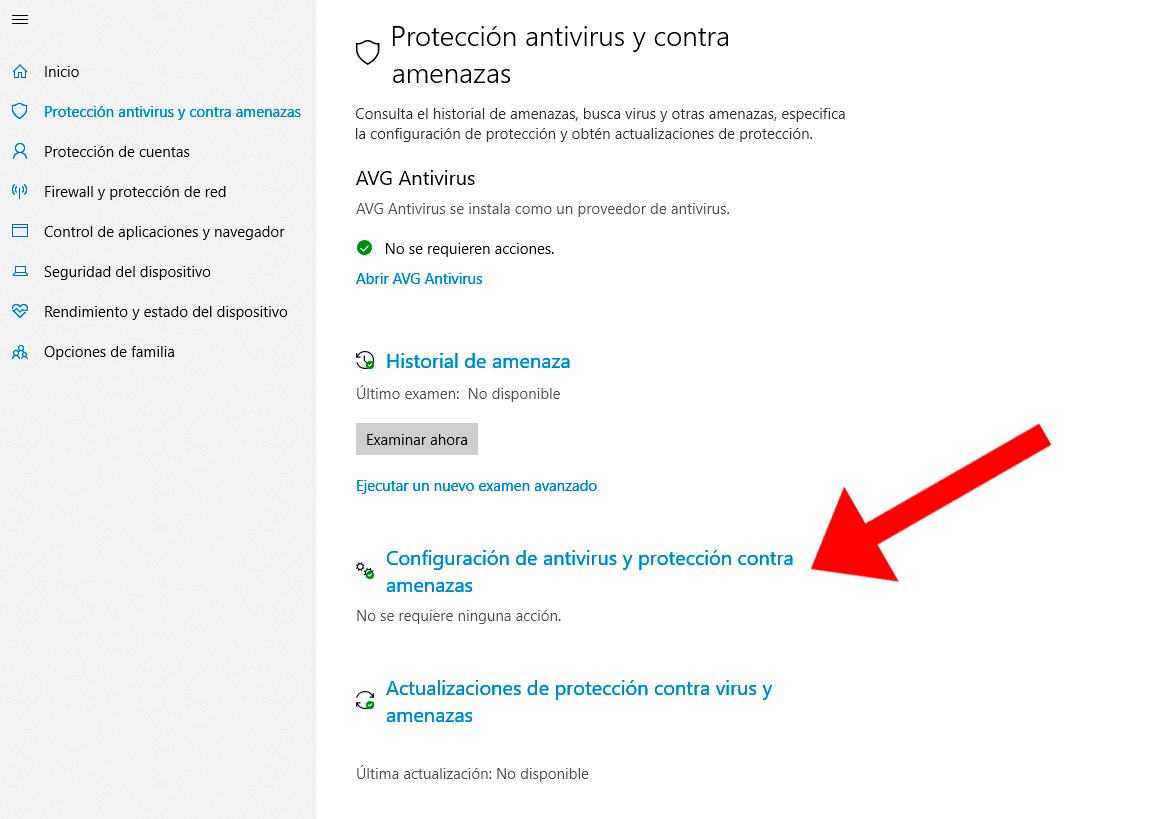
Now we will access the main window Antivirus and threat protection of Windows 10 where a summary of the latest scans performed by Windows Defender will be shown. Click now on the option Antivirus and threat protection settings, located further down.
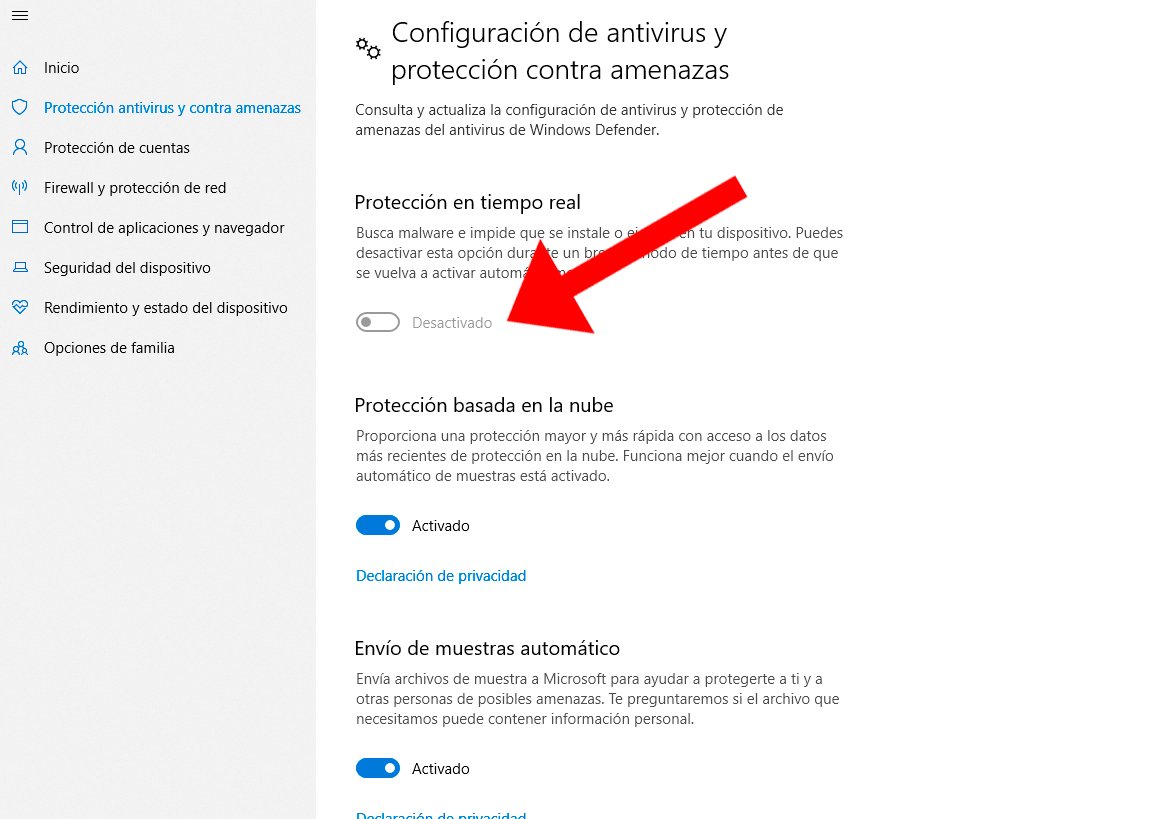
Here you can deactivate Windows Defender through the option Real-time protection, turning off the lowest switch and leaving it on disabled. Of course, as we say, after a short period of time, Windows Defender will be activated again so as not to put the security of your Windows-based computer at risk. Windows 10.
How to disable Windows Defender in Windows 10 completely
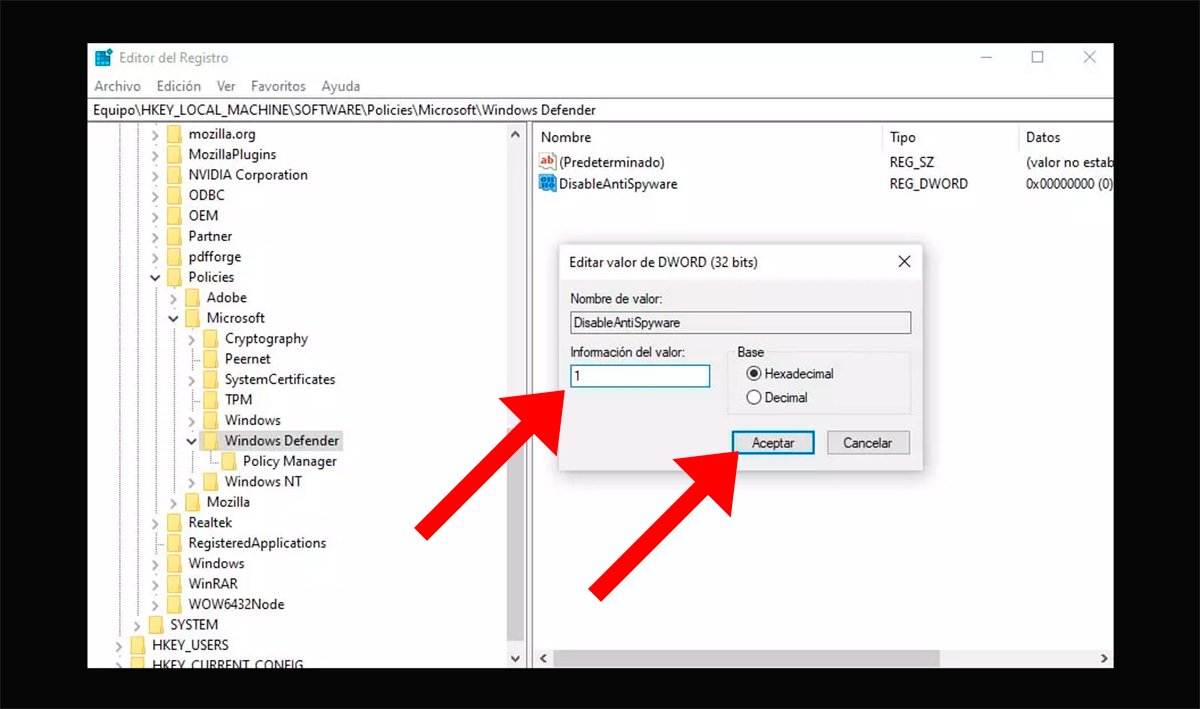
If you like completely disable Windows Defender In Windows 10 you will have to access the system registry and disable the Windows Defender tool. For this reason, and first of all, we recommend carrying out a copy of the windows registry, either by creating a registry backup or creating a Windows 10 restore point in case a problem occurs during the process and thus return to a functional operating system point. Follow the steps below:
- Open the window Execute with the command Win+R.
- Write the command regedit and press Enter.
- Navigate to the route HKEY_LOCAL_MACHINESOFTWAREPoliciesMicrosoftWindows Defender.
- Create a new 32-bit DWORD value with the name DisableAntiSpyware.
- Assign the value 1 to DisableAntiSpyware.
- Restart your computer to save the changes.
After carrying out this process, Windows Defender will be completely disabled; If you want to enable it again you will only have to follow the same steps and change the value to 0 either directly delete the registry value.
How to disable Windows Defender in Windows 10 Pro
On the other hand, if you have the version Pro, Enterprise or Education Windows 10, you can disable Windows 10 antivirus through local group policies. Follow the steps below:
- Open the window Execute with the command Win+R.
- Write the command gpedit.msc and press Enter.
- Navigate to the potion Computer Configuration – Administrative Templates – Windows Components – Windows Defender Antivirus.
- On the right side, double click on the option Disable Windows Defender Antivirus.
- In the new window, check the box Enabled.
- Click on Apply and Accept.
- Restart your computer to save the changes.
If you want to enable it again, you will only have to follow the same steps and select the option Not configured.
Consequences of disabling Windows Defender in Windows 10
Each user has their reasons for deactivating Windows Defender, although it is necessary to be clear about the consequences to do so to avoid greater evils. And Windows Defender offers protection against viruses and threats when browsing the Internet, including ransomware protection, account protection, more secure login and more.
Additionally, Windows Defender includes a Firewall to determine who can or cannot enter our network, blocking applications and checking unrecognized applications and files. Lastly, it also adds a Additional encryption and secure boot to prevent any malicious software from loading at system startup.

