Windows 10 allows us rename of our PC or equipment quickly and comfortably, although many users do not know how to find the option or simply did not know how to do it; until now. And we offer you a step by step tutorial to modify the name or nomenclature associated with our computer based on Windows 10, a very interesting option if you simply want to rename the computer or want to easily identify it when it is connected to a home network or other service networks, along with many other computer equipment or devices of any type. So much so, that we can change the team name as many times as we want, but to do so we must follow some specific steps; next, how to change the name of your PC in Windows 10.
How to change the name of your PC in Windows 10
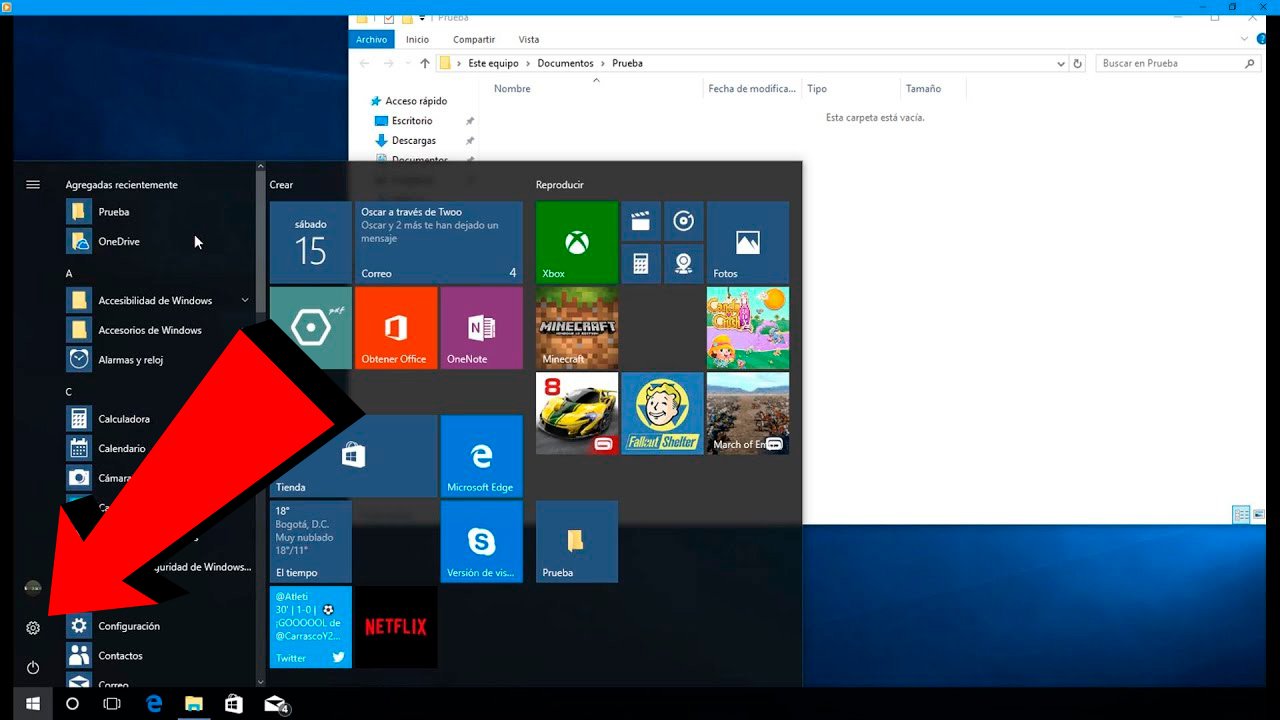
The first step is to access the Start Menu of Windows 10 and then enter Windows Settings through the gear wheel icon located second up above the Windows icon, just above the icon Start/Shutdown of Windows 10.
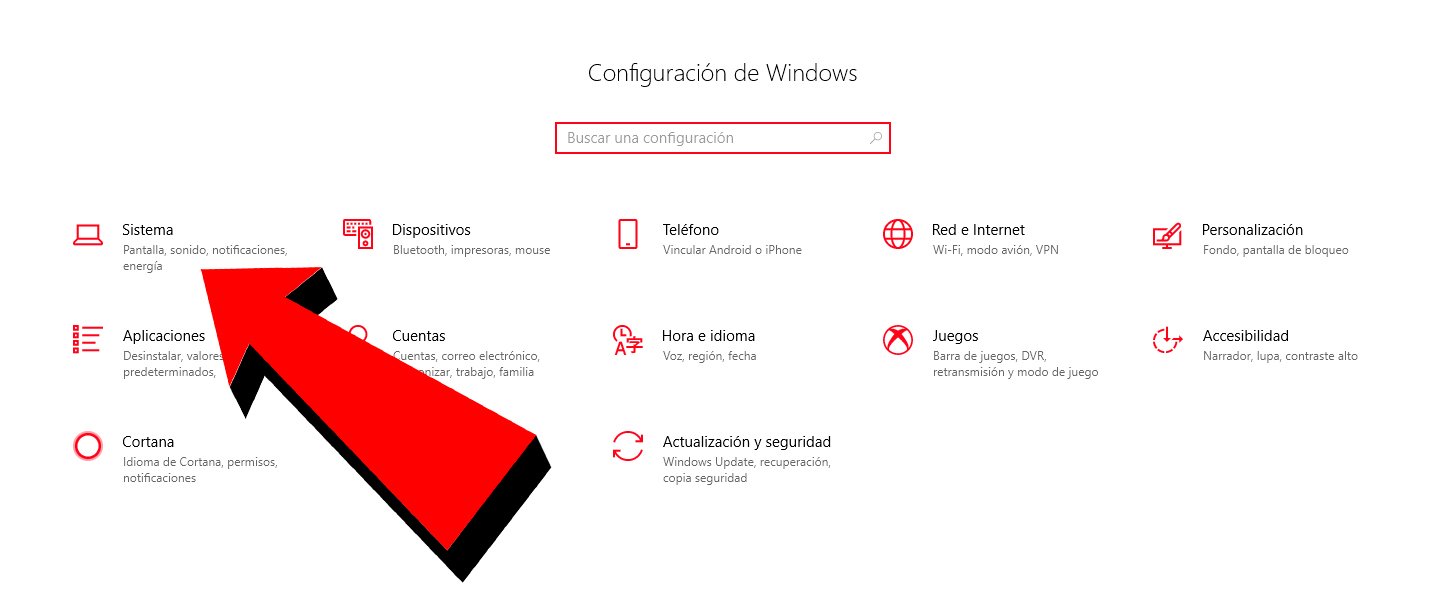
Now in the full screen menu Windows Settings, we must access System through the icon represented by a computer and with the same name, with the subtitle Screen, sound, notifications, power. Through this icon we will access the different specific configuration options of our equipment.
Once in the general menu System, we must go to the last option About, where we will be shown the general information about our equipment, from serial numbers to the version of the operating system, including information about the hardware, in addition to the current name of our equipment in the entry Device Name. The default name is probably a series of letters and numbers.
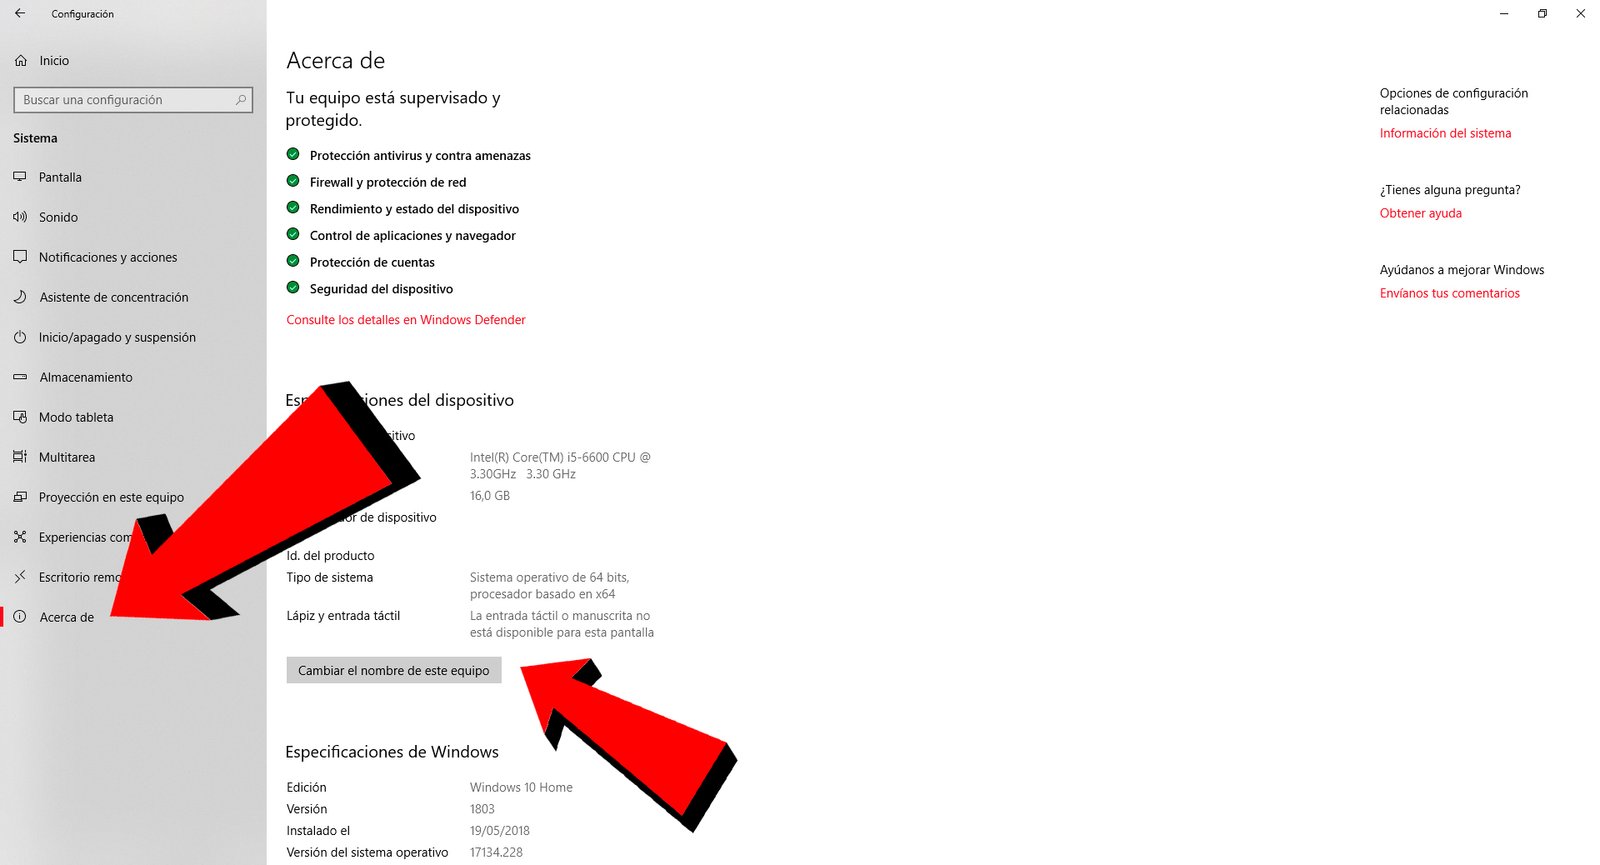
To change the name of our team we must click on the button Change the name of this computer, located below the computer specifications and above the Windows specifications.
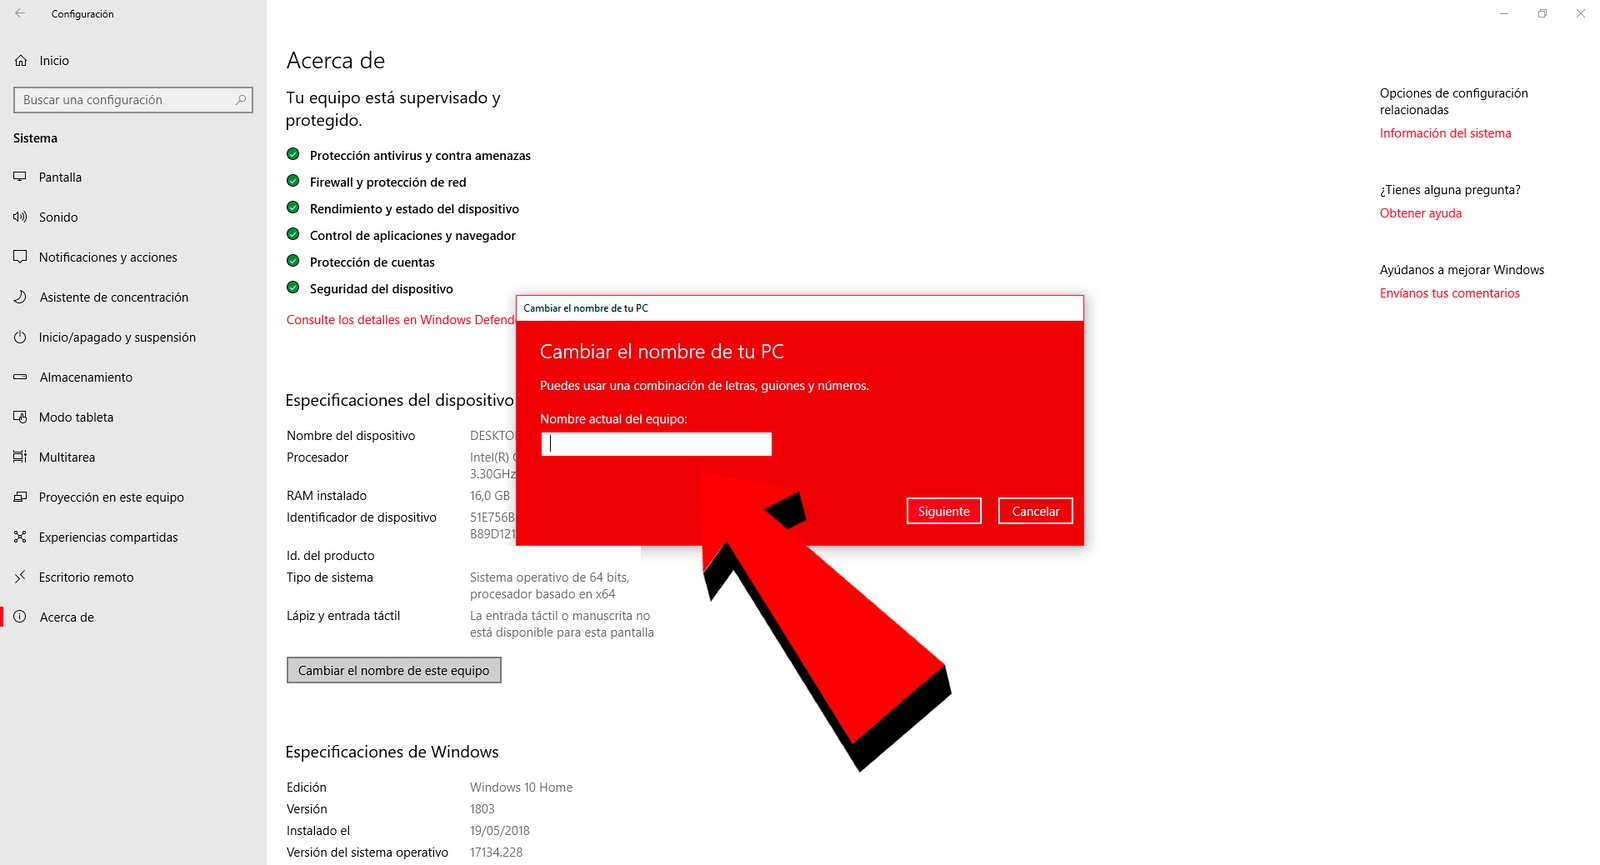
After pressing this button, a pop-up window with the option of Change the name of your PC. In the text box, just below our current computer name, we can enter the new name for our PC, this time, without letter spaces, hyphens or numbers. Once we have written the complete and definitive name, we must press Following to confirm the changes.
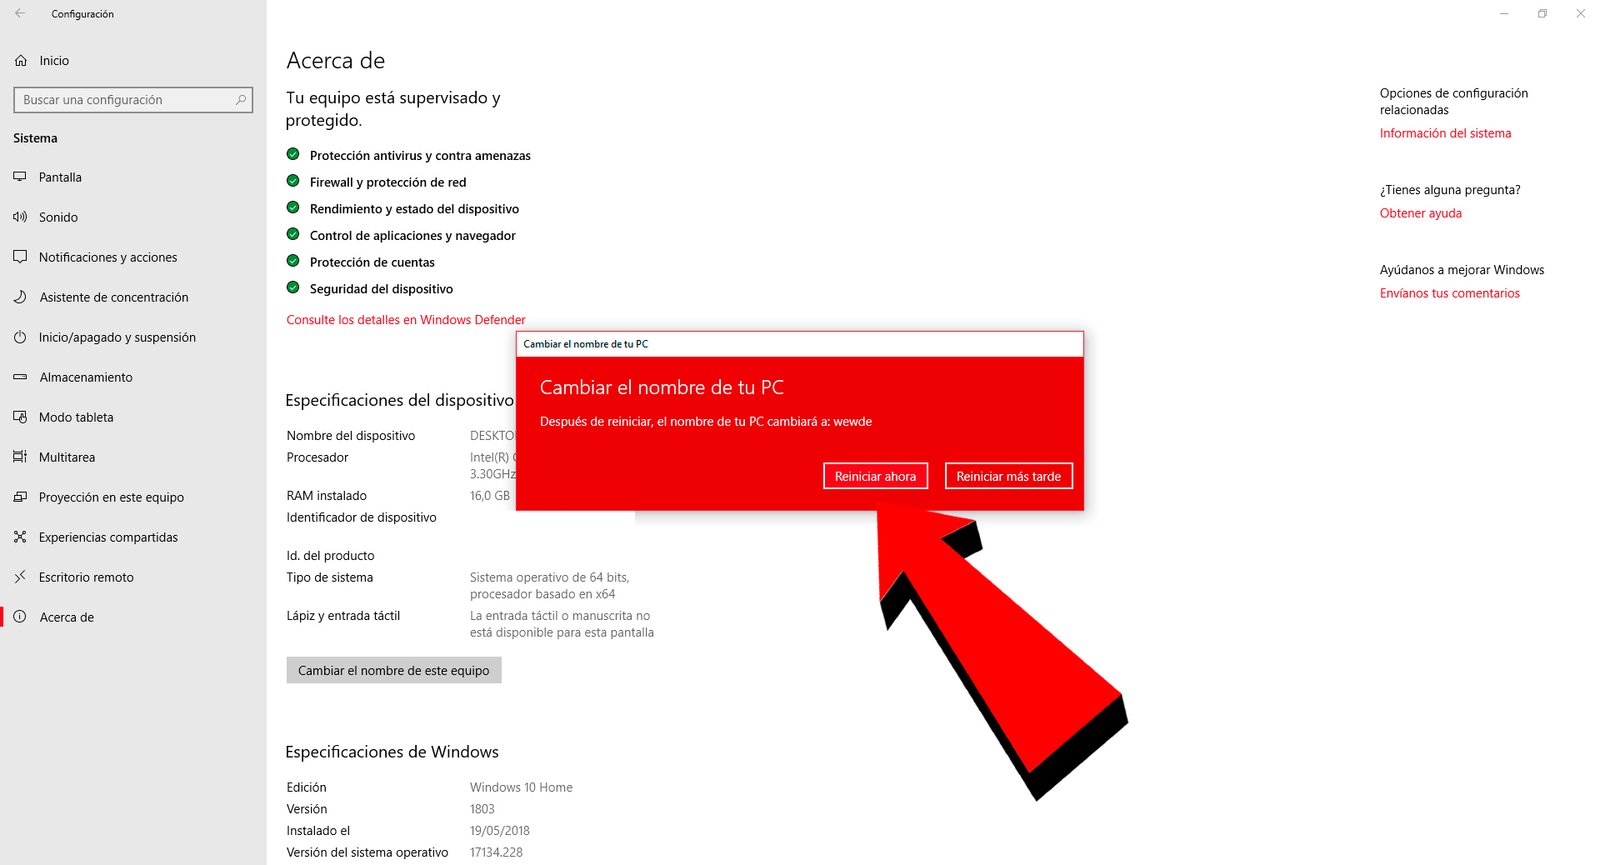
The last step will be Restart the system for the changes to take effect, through two options: Restart now and Reboot later. We must choose one of the two options if we want to apply the changes immediately or on another occasion if we are doing other things at that moment. Once the computer has restarted, our PC will have a new identifying name.
Additional note
Depending on our user configuration, with multiple users with passwords To access their respective Windows 10 sessions, the system may ask us to enter our password. Microsoft to access our session even if we do not have the password access option configured. If something like this happens to us and we want to log in again without a password, we just have to put the original team name back with which Windows 10 was configured; This way there will be no compatibility problems between users and their passwords.
