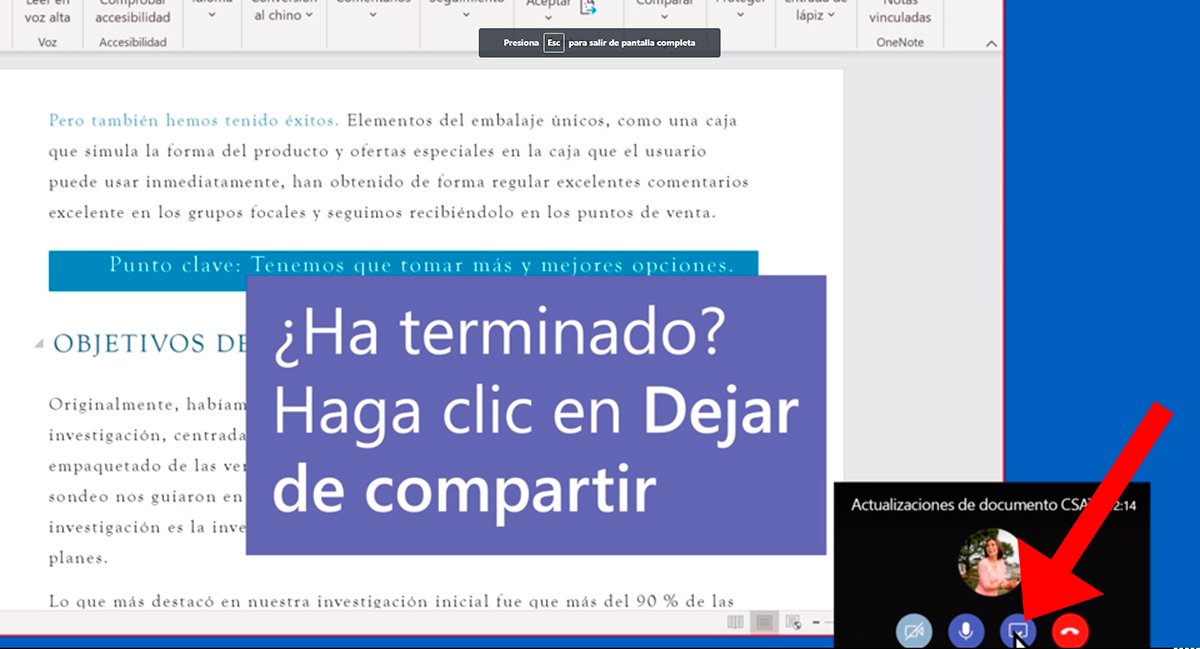
Next we will explain how to share screen on Teams, the popular application of video calls of Microsoft. And with the increasingly widespread use of this type of real-time video communication platforms, you have surely come across the need to share your screen with the other interlocutor to explain or show something specific in a way visual, so that the other user of the video call can view content in real time of the program or application you have open at that very moment. Screen sharing in Teams is actually very simple; let's see how to share screen on Microsoft Teams.
How to share screen in Microsoft Teams
Follow the steps below to screen sharing in Microsoft Teams in Windows 10 either macOS:
- Point your mouse pointer to the bottom-center corner of the Teams window during a video call.
- Select chat control options.
- Click on the third icon from the left with square shape with an arrow pointing down.
- Now you can choose one of your screens, desktop, window or program to share with the rest of the users of the video call.

Furthermore, it is also possible share the audio from your computer if you wish, to play a video or audio clip as part of the presentation; for it check the audio icon from the same menu to share the sound from your computer.
Of course, you should know that when sharing screen, everything that is displayed on your shared screen marked by a red frame, it will be visible to the rest of the users, so you must be careful with the things that are seen on your screen and not show anything compromised, for example, in a Work meeting with other classmates watching.

To stop screen sharing in Teams you just have to press the button Stop sharing located in the lower right corner of the screen.

As an additional feature, Microsoft Teams offers the tool Microsoft Whiteboard For video call sessions, a space on the screen shared with the rest of the participants where they can write things down or draw pictures in real time, with the possibility that all users can participate at the same time.

